
TL;DR
Moving your rig out of sight is the most effective noise fix. Proper placement and treatment of reflection points matter more than foam alone. Ventilation is key when sealing a closet for a quiet, cool setup.
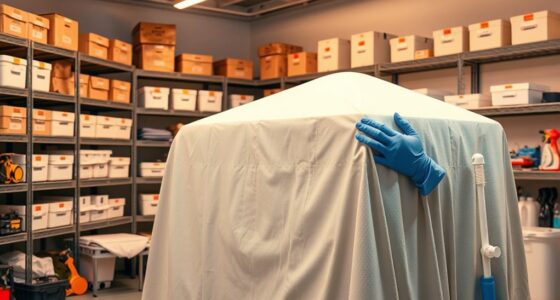
Ever wonder why your closet booth sounds boxy or boomy? It’s not just about slapping foam on the walls. The real secret is where you put your treatment, how you handle airflow, and whether your rig’s noise is even reaching your ears. Moving your setup into another room—away from where you work—can cut noise dramatically. It’s a simple trick that beats layers of foam every time.
This article will walk you through the most practical strategies for making your closet a quiet, effective studio space. From placement tips to ventilation solutions, you’ll learn how to turn a cramped closet into a sound-friendly environment without turning it into a furnace.
Acoustic dampening
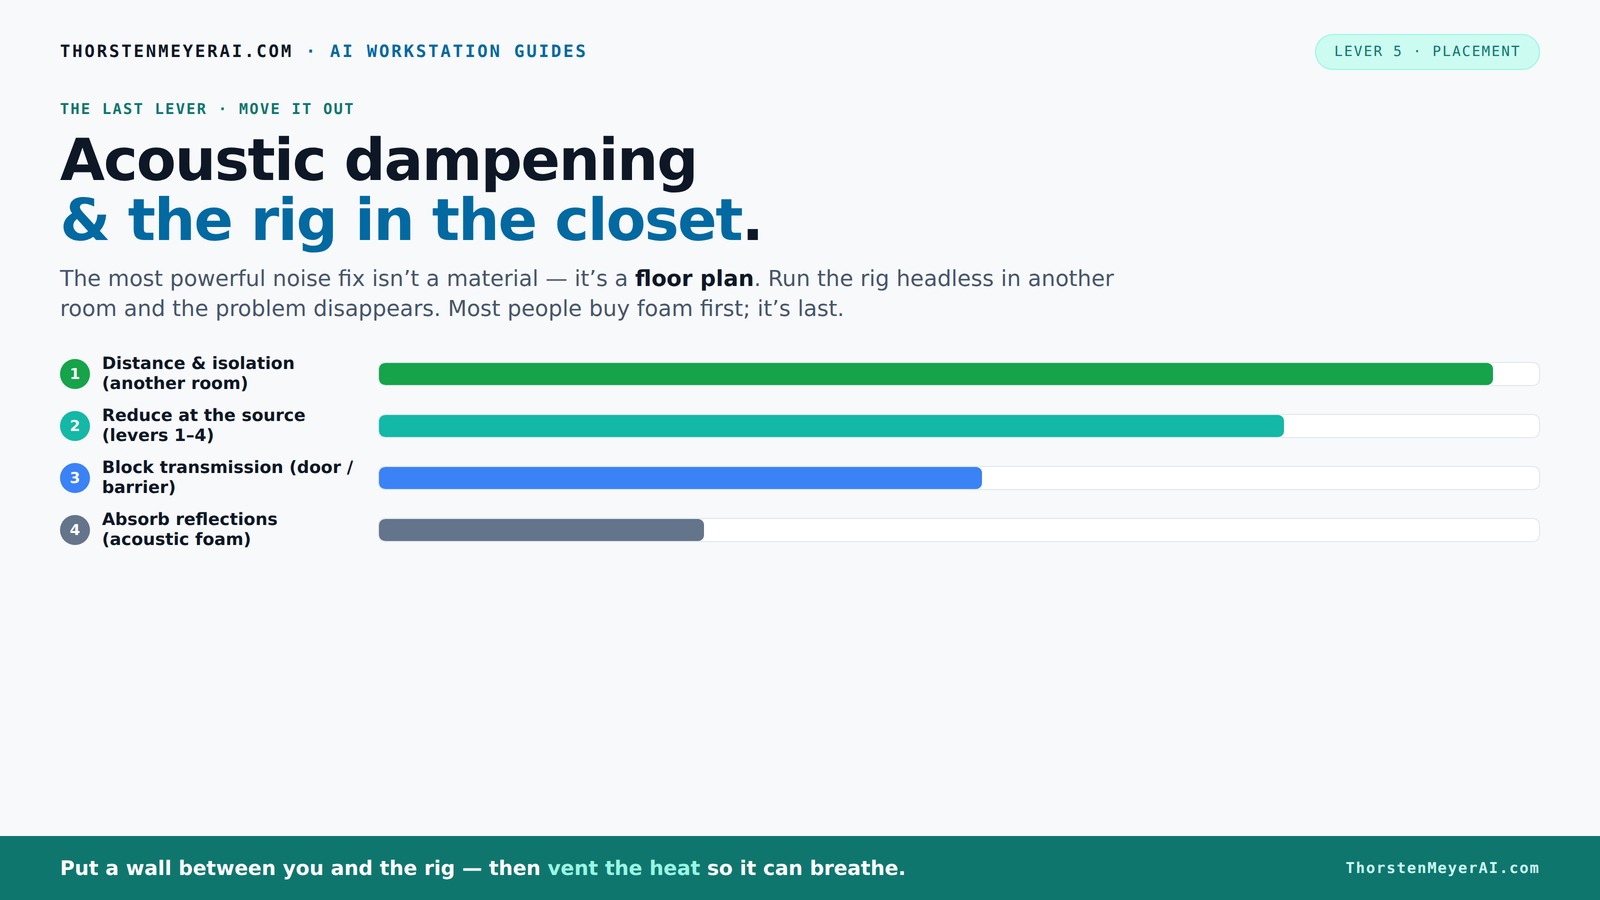
& the rig in the closet.
The most powerful noise fix isn’t a material — it’s a floor plan. A rig you can’t hear because it’s in another room beats any amount of foam. Tap the approaches in Part 1 to see what actually works.
(another room)
(levers 1–4)
(door / barrier)
(acoustic foam)
Contain the noise, not the heat
Key Takeaways
- Distance your rig from your workspace whenever possible—it's the most effective noise reduction.
- Treat reflection points based on your mic and speaker placement first—place panels where sound bounces back.
- Seal gaps around doors and vents to prevent sound leaks and improve overall quietness.
- In small closets, broad absorption and coverage matter more than obsessing over corners.
- Always include ventilation solutions when sealing a closet to keep your hardware cool and safe.

AmazingSpark 1 Pcs 48" X 6' Soundproof Room Divider Panel, Foldable Acoustic Partition Wall with Stand and Straps, Freestanding Privacy Screen for Office Study Bedroom Studio Library (Grey)
Soundproofing & Privacy:our acoustic room divider panel is crafted with acoustic foam and felt to help reduce noise...
As an affiliate, we earn on qualifying purchases.
As an affiliate, we earn on qualifying purchases.
Why Moving Your Rig Is the Easiest Noise Fix You Can Do
When it comes to noise, distance is your best friend. Moving your setup into another room is like turning down the volume with a switch. No matter how much foam you add, if the sound waves still reach you, it’s not enough.
Imagine your GPU whirring at 80 decibels. If you place it in the closet and sit next to it, you’ll hear every hum. But if you SSH into it from your quiet desk, that noise vanishes. The sound is trapped in the closet, but your workspace stays silent. It’s the most effective, low-cost fix that doesn’t involve adding more panels or foam.
For an AI workstation, this strategy is perfect. Your machine can roar in a closet or basement, while your work area remains peaceful. Just ensure you have a wired network connection and proper ventilation, which brings us to the next point.

Focusound 52 Pack Acoustic Foam Panels 1" x 12" x 12" Sound Proof Foam Panles Soundproofing Noise Cancelling Wedge Panels for Home Office Recoding Studio with 300PCS Double-Side Adhesive
Soundproofing - Acoustic foam panels triangular grooves structure for better noise absorption, helps to reduce and absorb unwanted...
As an affiliate, we earn on qualifying purchases.
As an affiliate, we earn on qualifying purchases.
The “Rig in the Closet” Setup — The Best and the One Big Caveat
Placing your high-performance rig inside a closet or cabinet is a game-changer for noise. It’s like building a soundproof box. But here’s the catch: heat. A sealed space traps warmth, turning your closet into a sauna for your PC or GPU.
Imagine your 600W GPU working nonstop. Without airflow, temperatures skyrocket. Fans spin faster, noise increases—defeating the purpose. So, the key is to provide ventilation: a passive vent or, better, a quiet exhaust fan that pulls hot air out.
High-end soundproof cabinets combine foam lining with active airflow, maintaining cool temps while muffling noise. They can handle several kilowatts of heat, but they cost more. For DIY, simple solutions like layered blankets or mounting a fan and vent in the closet work surprisingly well.
Need more details? Check out how to keep your closet cool and quiet in this guide on reducing heat and noise in your AI workstation.

Tuneful Cables Sound Isolation Pads, Cork Pads for Speakers to Improve Sound and Reduce Vibration (1" Pack of 8)
ELEVATE YOUR SPEAKER'S PERFORMANCE: Tuneful Cables Cork Isolation Pads for Speakers measure 2" x 2" x 7/8" and...
As an affiliate, we earn on qualifying purchases.
As an affiliate, we earn on qualifying purchases.
Placement Matters: Where to Put Your Panels for the Best Sound
Acoustic dampening isn’t just about slapping foam everywhere. It’s about placing it where sound bounces. In a closet, the main reflection points are the wall behind the mic, the ceiling, and the side walls.
Imagine you're recording vocals in a tiny room. The first reflection points are where your voice bounces back into the mic—those are your targets. Use a mirror trick: hold a mirror against the wall while speaking or singing. Wherever you see your mic’s reflection, that’s where to put panels or blankets.
For low-frequency control, bass traps in the corners make a big difference. A small closet might need just 2-inch panels, but larger or more problematic spaces benefit from 4-inch thick treatment.
Effective placement of panels at these reflection points reduces echo and flutter, which otherwise can cause your recordings to sound distant or muddy. By targeting these critical spots, you're addressing the primary pathways for sound reflections, leading to a clearer, more professional sound. Proper placement of panels minimizes the need for excessive treatment and ensures that your sound treatment addresses the actual issues—reflections—and not just the surface appearance.

8" Room to Room Fan with Remote, Reversible Through Wall Fan for Quietly Circulating Air, 320 CFM Through the Wall Fan with Temperature Control, Durable Build Quality, In Wall Fan for Closet, Laundry
【QUIET, MOVE MASSIVE AIR】 This room to room fan quietly circulates air between two rooms to maintain a...
As an affiliate, we earn on qualifying purchases.
As an affiliate, we earn on qualifying purchases.
How to Block the Door and Gaps — Stop Sound Leaks at the Weak Point
The door is often the weakest link in a closet setup. Gaps around the frame let sound escape and noise come in. Sealing it is easy but crucial.
Start with weatherstripping or draft sealant around the door edges. Hang a heavy blanket or acoustic curtain over the door. For more serious setups, use dense acoustic panels or even a DIY panel with insulation inside.
For example, I hung a thick quilt over my closet door and sealed the gaps with foam tape. That cut the noise transmission drastically. It’s simple, cheap, and effective.
Sealing gaps and leaks is essential because sound travels through even tiny openings. By blocking these, you prevent your noise from leaking out and external noise from entering, greatly improving your overall acoustic environment. For more tips, see this guide on sealing gaps.
Bass Traps and Low-End Control — Do You Really Need Them in a Closet?
Bass buildup is a common problem in small, boxy spaces. Bass traps can help, but in tiny closets, broad absorption may matter more than corner treatment alone. Learn more about bass trapping and low-end control.
Think of it like tuning a guitar. You want a balanced sound. In small closets, adding absorption on all surfaces can reduce that boomy low-end and improve clarity.
For example, I added foam panels on the back wall and a couple of bass traps in the corners. My recordings went from muddy to tight and controlled.
Understanding the importance of bass trapping is crucial because low frequencies tend to accumulate in small, enclosed spaces, creating a muddy or boomy sound. Properly placed bass traps absorb these low-end resonances, leading to a cleaner, more accurate audio signal. In very small rooms, broad coverage of absorption materials across multiple surfaces often yields better results than focusing solely on corners. This balanced approach ensures low frequencies are controlled without overly deadening the entire space, maintaining natural sound while reducing muddiness.
DIY Acoustic Solutions — Can You Make a Closet Booth Without Permanent Construction?
Absolutely. Using blankets, rugs, and temporary panels is a common DIY approach. Hang layered blankets or foam panels with hooks or adhesive strips. This way, you can create a makeshift booth that’s easy to remove.
Imagine hanging a quilt with gaffers tape and adding some foam panels in reflection points. It’s cheap, flexible, and surprisingly effective for voice and mic recordings.
Want to get serious? Incorporate acoustic blankets with ducting or portable soundproof panels. You can find ready-made solutions or DIY with household items.
Check out more DIY ideas here.Ventilation and Heat — Keep It Cool Without Sacrificing Silence
Ventilation is the critical missing piece for closet rigs. A sealed space without airflow turns into a hot box. You need a quiet exhaust fan or passive vents to let heat escape.
Imagine your GPU running at 75°C in a tiny closet. Without proper airflow, it can hit 85°C or more, causing noise spikes and throttling. Installing a small, quiet fan or ducting hot air out ensures your hardware stays cool and quiet.
Some commercial soundproof cabinets combine foam with ducted airflow, making them both quiet and cool. For DIY, place a small fan in an exhaust vent and make sure fresh air can enter elsewhere.
Proper ventilation prevents overheating, which can lead to increased fan noise and potential hardware failure. It's a tradeoff—without adequate airflow, you risk thermal issues that can cause your system to become noisier or even damage your equipment. Incorporating ventilation solutions maintains a balance between silence and hardware safety, ensuring your setup remains both quiet and reliable.
Frequently Asked Questions
What’s the difference between acoustic dampening and soundproofing?
Acoustic dampening reduces echo and reflections inside a space, making it sound less ‘boxy.’ Soundproofing blocks sound from entering or leaving a room. Dampening is about inside sound control; soundproofing handles transmission between spaces.
Where should I place foam or panels in a closet booth?
Place panels at the main reflection points—behind the mic, the ceiling, and side walls—using the mirror trick. Bass traps in the corners help control low-end buildup. Cover as much surface area as practical for best results.
How much treatment do I need for a small closet?
In small closets, 2-inch panels at reflection points and some bass traps are usually enough. Larger or more problematic spaces benefit from 4-inch panels and broader coverage to prevent boomy sound and improve clarity.
Are corners really the most important place to treat?
Corners are key for bass trapping because low frequencies tend to accumulate there. But in tiny closets, broad absorption across walls can be more effective than obsessing over corners alone.
Do foam panels really work, or are blankets better?
Foam panels are effective at reducing echo and reflections, especially at high frequencies. Blankets can work well too, especially as DIY solutions, and are often easier to hang or reposition.
Conclusion
Turning your closet into a quiet, effective studio doesn’t mean covering every inch with foam. It’s about smart placement, sealing gaps, and ensuring proper airflow. Your setup can be loud in the closet but silent at your desk—if you do it right.
Remember, the best noise fix is often just moving the rig away. Combine that with strategic treatment and ventilation, and you’ll have a setup that’s both quiet and cool. Now, go build your perfect closet booth—quiet, efficient, and tailored to your needs.