
This guide helps beginners choose an outdoor grill, prepare a safe cooking area, light it, cook a meal, and clean it afterward. Set aside about 1–2 hours for a basic setup and first cook; assembly or permanent installation can take longer. Follow the grill manufacturer’s instructions for assembly, fuel, lighting, and maintenance.

Get garden gear delivered free with Prime
- Fast, free delivery on millions of items
- Prime Video, Amazon Music and more included
- Member-only deals all year

Brand-Man 40-Inch Built-In 6-Burner Gas Grill Head
- ✔ Fuel: Liquid propane; convertible to natural gas with separately sold kit
- ✔ Burners: 6 stainless steel burners
- ✔ Total burner output: 60,000 BTU

SPIRE 30-Inch Built-In 5-Burner Gas Grill with Rear Burner
- ✔ Fuel: Gas
- ✔ Main burners: 5 × 10,000 BTU
- ✔ Rear burner: 13,000 BTU

Brand-Man 6-Burner Outdoor Gas Grill Island with Side Burner
- ✔ Fuel: LPG; convertible to natural gas with optional kit
- ✔ Main burners: 6 × 10,000 BTU
- ✔ Side burner: 12,000 BTU
Difficulty: Beginner | Time: 1–2 hours for setup and a first cook; installation time varies
What You’ll Need
Tools & Materials:
- Outdoor grill and manufacturer’s manual
- Fuel specified for the grill: propane, natural gas, charcoal, or pellets
- Long-handled grill tongs and spatula
- Grill brush approved for the grate material
- Instant-read food thermometer
- Heat-resistant gloves
- Food-safe plates and utensils, including a clean plate for cooked food
- Dish soap, sponge, and a bucket or hose for cleaning
Knowledge:
- Basic food-handling practices, including separating raw and cooked food
- How to read the grill’s fuel and lighting instructions
Check local fire rules, building or lease restrictions, and the grill’s clearance requirements before setup. Use grills outdoors only, away from buildings, overhangs, dry vegetation, and foot traffic. Do not use a grill in a garage, tent, enclosed porch, or other enclosed space, even with the door open. If a fuel connection or installation is damaged or unclear, have a qualified professional inspect it before use.
Brand-Man 40-Inch Built-In 6-Burner Gas Grill Head
For a permanent outdoor kitchen island, this Brand-Man grill head makes the strongest all-around case. Its 860 square inches of listed cooking space exceed the SPIRE’s 750 square inches and include a large warming rack, while six burners support separate cooking zones. The included cast iron griddle plate also makes breakfast foods and smaller ingredients easier to cook without adding another accessory.The double-walled hood, built-in thermometer and slide-out grease tray address practical parts of a built-in setup: retaining heat, checking the cooking environment and reaching the grease pan for cleanup. Compared with the Brand-Man wheeled island, this model leaves the island layout to you, so you can coordinate the grill head with your own counters and storage. That flexibility comes with a precise requirement: the cutout must fall within the specified dimensions. It uses liquid propane as supplied, and natural gas conversion requires a separately sold kit. We’d choose it for an island being designed or measured around the grill; we’d skip it if we need a ready-made mobile station.
Pros:
- 860 sq. in. total listed cooking space, including a 240 sq. in. warming rack
- Six burners for cooking across multiple zones
- Includes cast iron grates and a griddle plate
- Double-walled hood and removable slide-out grease tray
Cons:
- Requires a built-in cutout within the specified dimensions
- Natural gas conversion kit is sold separately
- Listed overall width varies from 39.7 to 45.4 inches, so installation measurements need care
Best for: Homeowners building a fixed outdoor kitchen who want six cooking zones, a griddle surface and a large warming rack.
Not ideal for: Buyers who need a freestanding grill, cannot meet the cutout dimensions or want natural gas without purchasing a conversion kit.
Bottom line: We rank this first for a permanent outdoor kitchen because it combines the lineup’s largest listed cooking area with six burners and a griddle plate.
“We rank this first for a permanent outdoor kitchen because it combines the lineup’s largest listed cooking area with six burners and a griddle plate.”
SPIRE 30-Inch Built-In 5-Burner Gas Grill with Rear Burner
The SPIRE is the better fit when a built-in grill needs to occupy less width than the 40-inch Brand-Man. Its 750-square-inch cooking surface is smaller than the Brand-Man head’s 860 square inches, but five 10,000 BTU main burners still give us a broad primary cooking area. The extra 13,000 BTU rear burner is its defining distinction: it supports rotisserie cooking or warming, a capability neither of the other listed configurations specifically highlights.Stainless steel frame and 304 stainless steel grates are intended to hold up to outdoor use and simplify cleanup; the removable grease tray gives us an accessible collection point. Compared with the Brand-Man built-in, the SPIRE trades some cooking area and one main burner for the rear-burner arrangement and a 30-inch-class format. It still demands a permanent installation, and at 121 pounds it will take planning to position during installation. Choose it if a narrower built-in and rotisserie option matter more than maximum grill space or a supplied griddle.
Pros:
- Five main burners plus a dedicated rear burner
- 750 sq. in. cooking surface for a compact built-in format
- 304 stainless steel cooking grates and stainless steel frame
- Removable grease tray and electronic ignition
Cons:
- Built-in installation limits placement
- At 121 lb, it is heavy to handle during installation
- Smaller cooking surface than the 40-inch Brand-Man and no listed griddle plate
Best for: Outdoor kitchen owners with a narrower built-in space who want a rear burner for rotisserie cooking or warming.
Not ideal for: Buyers who prioritize the largest cooking surface, an included griddle plate or a freestanding grill they can reposition.
Bottom line: We recommend the SPIRE when a narrower permanent installation and rear-burner versatility matter more than maximum cooking area.
“We recommend the SPIRE when a narrower permanent installation and rear-burner versatility matter more than maximum cooking area.”
Brand-Man 6-Burner Outdoor Gas Grill Island with Side Burner
Where the other two products are grill heads for an island, this Brand-Man arrives as a wheeled grill island with enclosed storage. Six 10,000 BTU main burners and a 12,000 BTU side burner let us cook on the main grate while using a separate surface for a pot or pan. The listed 871-square-inch total cooking area is the largest here, though it includes the warming rack; the 624-square-inch main area is only slightly larger than the 40-inch built-in’s 620-square-inch primary area.Cast iron grates, a griddle plate, a warming rack and a full-size slide-out grease tray make this the most equipped option for cooking and cleanup. Eight wheels, including two lockable swivel casters, help with moving and parking it, but 163.1 pounds and a 67.5-inch length mean it still needs substantial patio space and effort to position. Unlike the built-in heads, it does not require a specified island cutout, though it gives us less freedom to design integrated counters around the grill. It arrives in two separate boxes, and natural gas conversion takes an additional kit.
Pros:
- Six main burners and a separate 12,000 BTU side burner
- Includes cast iron grates, griddle plate and warming rack
- Enclosed storage cabinet and folding side table
- Eight wheels, two lockable swivel casters and slide-out grease tray
Cons:
- Large footprint and 163.1 lb weight require space and planning
- Natural gas conversion kit is sold separately
- Arrives in two separate boxes
Best for: Buyers who want a grill, side burner and enclosed storage together in a movable outdoor cooking station.
Not ideal for: Those with a tight patio, a custom fixed island plan or a preference for a lighter unit delivered in one box.
Bottom line: We’d choose this island over either built-in head when side cooking, storage and wheels are more useful than a fixed, integrated installation.
“We’d choose this island over either built-in head when side cooking, storage and wheels are more useful than a fixed, integrated installation.”
As an Amazon Associate we earn from qualifying purchases.
Before You Start
Read the manual before assembling or lighting the grill. Place a portable grill on a stable, level, noncombustible surface with the clearances specified by its manufacturer. Keep children and pets away from the cooking area, and keep a suitable fire extinguisher or other recommended fire-control equipment accessible. Check the weather: strong wind can affect flames, and dry conditions may bring additional fire restrictions.
For gas grills, inspect the hose, regulator, and connections for wear or damage. If you smell gas, do not light the grill or operate electrical switches nearby. Shut off the fuel supply if you can do so safely, move away, and contact the gas supplier or emergency services as appropriate. For charcoal grills, use only charcoal and approved starters; never use gasoline or pour liquid starter onto lit coals.
Step-by-Step Instructions
Step 1: Choose a grill that fits your cooking and space
Decide how many people you usually cook for, what food you plan to grill, and how much space you have. Compare fuel types: gas heats quickly and offers adjustable burners, charcoal needs more time and hands-on temperature control, and pellet grills use pellets with a powered controller. Check the grill’s dimensions, cooking area, fuel availability, cleaning needs, and manual before buying. Measure the intended location, including room to open the lid and access fuel safely.
Tip: Confirm that the grill is rated for your intended fuel. Never convert a gas grill or connect it to a different fuel source without an approved conversion kit and qualified installation.
Check: The grill fits the intended space, uses an available approved fuel, and suits the number of people and types of food you plan to cook.
Step 2: Assemble and position the grill
Assemble the grill in the order shown in its manual, using the supplied hardware and tools. Tighten fasteners as directed, install the grates and heat shields, and check that wheels or feet are stable. Move the grill to its final outdoor location before connecting fuel. Keep it level, maintain the manufacturer’s stated clearances, and position it so smoke and heat will not blow toward doors, windows, or neighbors.
Tip: Do not place a grill beneath a roof overhang or close to siding, railings, branches, or stored fuel unless the manual specifically allows the clearance. Do not wheel a hot grill.
Check: The grill stands firmly, the cooking parts are installed correctly, and the surrounding area meets the manual’s clearance requirements.
Step 3: Connect or prepare the fuel
Follow the manual for the grill’s fuel type. For a propane grill, secure the cylinder upright in its designated position and connect the regulator by hand or as directed. Check every connection with a soapy-water leak solution if the manufacturer recommends it; bubbles indicate a leak. Shut off the cylinder and correct the connection only as the manual permits. If bubbles persist or parts appear damaged, stop and contact a qualified technician. For natural gas or pellet grills, use the specified supply and connection instructions. For charcoal, fill the firebox with the amount recommended for your cook and set up an approved lighting method.
Tip: Never test for a gas leak with a flame. Keep spare propane cylinders outdoors, upright, and away from heat sources.
Check: Fuel is connected or prepared as directed, connections show no signs of leakage, and controls are off before lighting.
Step 4: Clean the grate and preheat
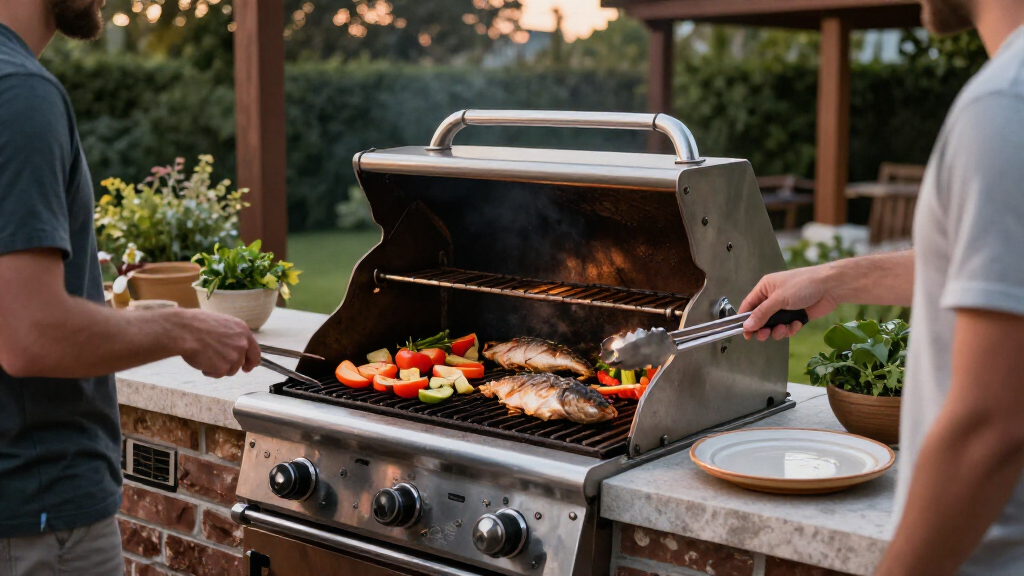
Remove leftover packaging and check the firebox for tools or debris. Brush the grate with a brush suitable for its material. Start the grill using the manual’s exact lighting sequence, with the lid open or closed as instructed. For gas, light burners in the specified order; for charcoal, light the coals with an approved starter and wait until they are ready; for pellets, follow the controller’s startup cycle. Close the lid when appropriate and preheat to the temperature the recipe calls for.
Tip: If a gas burner does not light, turn its control off and wait the period stated in the manual before trying again. This lets unburned gas disperse.
Check: The grill is lit steadily, the grate is clean, and the thermometer or controller shows the intended cooking temperature.
Step 5: Prepare food and organize the cooking area
Season and portion the food before it goes outside. Keep raw meat, poultry, and seafood separate from ready-to-eat food. Use separate plates and utensils for raw and cooked items, or wash them thoroughly between uses. Set out tongs, a thermometer, clean serving plates, and any sauces you need. Keep sauces that touched raw food separate from those used for serving.
Tip: Bring food out when the grill is ready rather than leaving perishable ingredients in warm outdoor conditions. Follow food-safety guidance for refrigerating food between preparation and cooking.
Check: Raw and cooked food have separate plates and utensils, and everything needed for the cook is within easy reach.
Step 6: Cook over the right heat and check doneness
Arrange food over the heat level recommended by your recipe. If the grill has multiple burners, create a cooler zone by reducing or turning off one burner; for charcoal, bank coals to one side. Close the lid when the recipe calls for it, turn food with clean tongs, and avoid repeatedly opening the lid. Check doneness with an instant-read thermometer inserted into the thickest part without touching bone. Use the safe internal temperature recommended by your local food-safety authority for that food; appearance alone cannot confirm safety.
Tip: Move food away from direct flames if fat causes flare-ups. Do not use water on a grease fire; turn off the burners or fuel if safe, keep the lid closed, and use the fire-control method recommended by the manufacturer.
Check: Food reaches the recommended internal temperature, and cooked food goes onto a clean serving plate.
Step 7: Shut down, cool, and clean the grill
Turn off gas burners and close the propane cylinder valve, following the manual’s shutdown order. For charcoal, close the vents and lid and let the coals cool completely; never put hot ash in a bin. For pellet grills, run the prescribed shutdown cycle before disconnecting power. After the grill cools enough to handle safely, brush the grate and empty the grease tray or ash collector as directed. Wash removable parts when needed, dry them, and return them to the grill. Cover the grill only when it is fully cool and dry.
Tip: Dispose of charcoal ash only when it is completely cold; embers can remain hot long after the grill appears finished.
Check: Fuel and controls are off, hot components have cooled, grease and ash are handled according to the manual, and the grill is clean and dry.
Common Mistakes to Avoid
- Placing the grill too close to a wall, roof, or dry material. — Choose an open outdoor location and follow the exact clearance distances in the grill manual and local fire rules.
- Lighting a gas grill with the lid closed or retrying immediately after a failed ignition. — Use the manual’s lighting sequence. If ignition fails, turn the controls off and wait the specified time before retrying.
- Using the same plate or utensils for raw and cooked food. — Set out separate clean serving equipment before cooking, and wash anything that contacts raw food.
- Judging food safety by color or cooking time alone. — Check the thickest part with a food thermometer and compare it with the recommended safe temperature.
Troubleshooting
Problem: A gas burner will not light.
Solution: Turn the burner controls off and wait as directed in the manual. Check that the fuel supply is open and the igniter is positioned correctly. Follow the manual’s lighting steps. If you smell gas or the burner still fails, shut off the supply and stop using the grill until it has been inspected.
Problem: The grill will not reach the desired temperature.
Solution: Check that the lid is closed when appropriate, the vents are open as required, and the fuel supply is adequate. On gas grills, verify that burners are lit and the cylinder is not nearly empty. On charcoal grills, allow more time for the coals to catch and adjust the vents. Follow the manual for pellet or controller faults.
Problem: Flames flare up while cooking.
Solution: Move food to a cooler zone with clean tongs and close the lid if the manual recommends it. Trim excess fat before future cooks and clean the grease tray. If flames persist or spread beyond the firebox, shut off fuel if safe and use the recommended fire-control equipment.
Problem: Food is browned outside but undercooked inside.
Solution: Move it to a cooler or indirect-heat area, close the lid when appropriate, and continue cooking. Check the thickest part with a thermometer. For the next cook, reduce direct heat or use a two-zone setup.
What Success Looks Like
The grill remains stable outdoors with the required clearance, lights and holds the intended heat, and cooks food to the recommended internal temperature. Raw and cooked food stay separate. At the end, fuel is shut off or the coals are safely contained, grease and ash are cleared after cooling, and the grill is ready for its next use.
Next Steps
After each cook, check the grate and grease tray and clean them as the manual recommends. Before the next use, inspect fuel lines, connections, wheels, and burners for wear or blockage. Store fuel as directed and keep the grill dry under a fitted cover once it has cooled. Arrange a professional inspection if a gas connection leaks, a burner is damaged, or the grill behaves unpredictably.
Frequently Asked Questions
Can I use an outdoor grill on a balcony?
Check local fire codes, building rules, and the grill manual before using one. Some buildings prohibit open-flame grills or restrict fuel types and distances. Do not assume a small or electric grill is permitted without checking the rules.
How long should I preheat an outdoor grill?
Use the manual and recipe as your guide. Many gas grills need several minutes to preheat, while charcoal grills need time for the coals to ignite and develop an even heat. Start cooking when the grill reaches the temperature the recipe calls for.
Should I leave the grill lid open while cooking?
Close the lid for most larger cuts and for recipes that rely on steady heat. Leave it open when the recipe calls for close monitoring or when cooking food quickly over high heat. Follow the grill and recipe instructions, since airflow needs differ by fuel and cooking method.
How can I tell when meat is done?
Use an instant-read thermometer in the thickest part, avoiding bone. Check the safe internal temperature for the specific food using current guidance from your local food-safety authority. Color and juices alone are not reliable checks.
Can I put the cover on right after cooking?
Wait until the grill is fully cool and dry. Covering a hot grill can damage the cover, and trapping moisture can encourage corrosion.