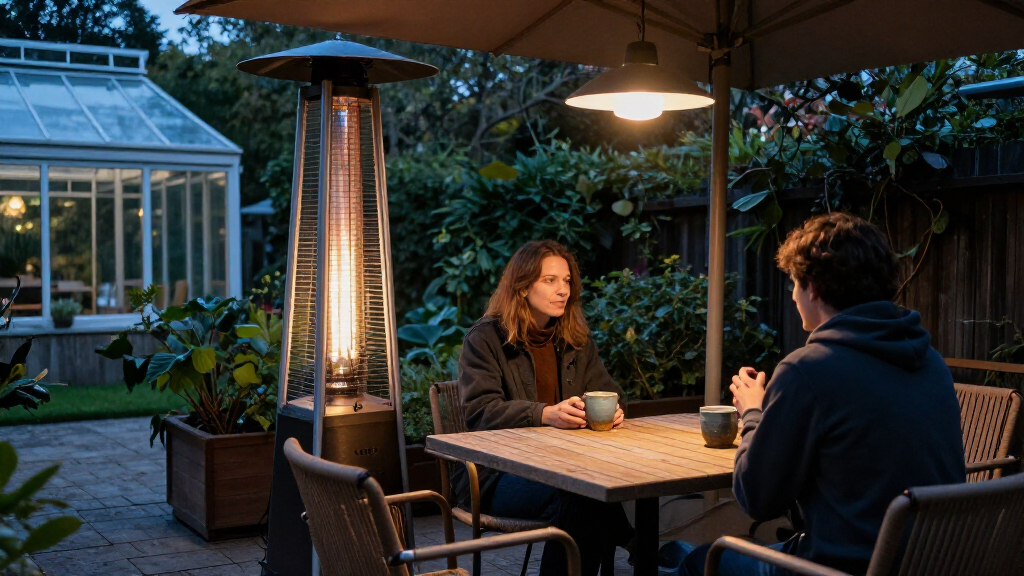
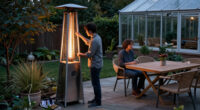
This guide shows homeowners and renters how to set up, light, operate, and shut down a freestanding propane patio heater. You will finish with a stable heater running outdoors, know how to check for common problems, and be able to store it safely. The steps are for a typical portable heater; follow the instructions supplied with your model whenever they differ. Allow 20–30 minutes for the initial setup and first lighting. No repair experience is needed.

Get garden gear delivered free with Prime
- Fast, free delivery on millions of items
- Prime Video, Amazon Music and more included
- Member-only deals all year

Sweetcrispy 48,000 BTU Patio Heaters for Outdoor Use with Wheels
- ✔ Heat output: 48,000 BTU
- ✔ Claimed coverage: 18-foot diameter
- ✔ Dimensions: 32.1 × 32.1 × 87 in.

NEWBULIG Patio Heater 48,000 BTU Propane Heater for Outdoor Use
- ✔ Heat output: 48,000 BTU
- ✔ Claimed coverage: 18-foot diameter
- ✔ Dimensions: 18.11 × 18.11 × 87 in.
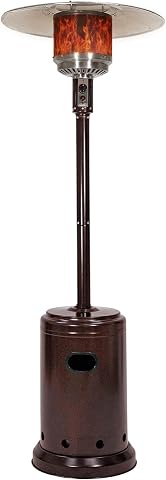
Amazon Basics 46,000 BTU Portable Outdoor Propane Patio Heater with Wheels
- ✔ Heat output: 46,000 BTU
- ✔ Claimed coverage: Up to 18-foot diameter
- ✔ Dimensions: 32.12 × 32.12 × 91.3 in.
Difficulty: Beginner | Time: 20–30 minutes for setup and first use
What You’ll Need
Tools & Materials:
- Propane patio heater and its manufacturer’s manual
- Compatible propane cylinder, filled and undamaged
- Adjustable wrench only if the manual calls for one
- Soapy water solution or approved leak-detection solution
- Work gloves
Knowledge:
- Ability to identify the heater’s control knob and cylinder valve
- Ability to read the model’s lighting and shutdown instructions
Use only the cylinder type and size listed for your heater. Assemble the heater on a firm, level surface outdoors, away from overhangs and combustible materials. Do not use an indoor propane heater outdoors or adapt fittings to make an incompatible cylinder fit.
Sweetcrispy 48,000 BTU Patio Heaters for Outdoor Use with Wheels
For a patio where people gather around a central heater, Sweetcrispy offers the most complete mix of output and convenience in this group. Its 48,000 BTU rating is the highest listed here, and the product claims warmth across an 18-foot diameter. A built-in round side table adds a place for drinks or small items, a useful distinction from the more stripped-down NEWBULIG and Amazon Basics designs.The double-layer 304 stainless steel burner is presented as a durability feature, while flame-out and 45-degree tilt shutoffs address two common safety concerns for freestanding gas heaters. Wheels make it easier to reposition, and included ground anchors can help secure it on suitable outdoor surfaces. Those details make the Sweetcrispy a strong all-rounder for a fixed gathering area that occasionally needs rearranging.Its tradeoff is size: at 32.1 inches wide and 87 inches tall, it takes up more floor area than NEWBULIG’s listed 18.11-inch width. The table also adds a practical surface but does not make the heater compact. The description says anchors can fasten it on uneven ground, but does not establish suitability for every patio surface. Choose it for the combination of output and table; consider NEWBULIG if footprint matters more, or Amazon Basics if its water-weighted base and tank chain better match your setup.
Pros:
- 48,000 BTU listed output, the highest of these three.
- Built-in round table adds a convenient surface near seating.
- Double-layer 304 stainless steel burner is specified.
- Flame-out and 45-degree tilt shutoff protections are described.
Cons:
- 32.1-inch listed width takes up more floor space than NEWBULIG.
- Propane tank inclusion is not stated in the supplied details.
- Anchoring support may depend on having suitable outdoor ground.
Best for: Patio hosts who want a high-output freestanding heater with an integrated place for drinks and small essentials.
Not ideal for: People with narrow walkways, small balconies, or a need to store a compact heater between uses.
Bottom line: We rank Sweetcrispy first for combining the lineup’s highest listed output with a useful table and multiple stated safety features, provided you have room for its broad base.
“We rank Sweetcrispy first for combining the lineup’s highest listed output with a useful table and multiple stated safety features, provided you have room for its broad base.”
NEWBULIG Patio Heater 48,000 BTU Propane Heater for Outdoor Use
NEWBULIG makes the clearest case when patio floor space is at a premium. Its listed dimensions are 18.11 inches square, considerably narrower than the 32.1-inch width given for Sweetcrispy and Amazon Basics. That smaller stated footprint can leave more room for chairs and circulation, while the heater still claims 48,000 BTU output and an 18-foot heating diameter.Heat adjustment is another useful distinction: the listing specifies a one-touch ignition and adjustable flame, so users can vary output instead of treating the heater as an all-or-nothing appliance. It also includes wheels, a side cutout for checking the propane tank position, and flame-out and 45-degree anti-tilt protection. At 33 pounds, it is portable enough to reposition, though wheels do not remove the need to move and secure a tall appliance carefully.Compared with Sweetcrispy, NEWBULIG gives up the tabletop and has less explicit burner construction detail in the supplied description, but it is the more space-conscious choice. Its ground anchors are described as suitable for lawns and soft ground, not hard concrete, which limits their usefulness on many decks and patios. If you want the water box and tank chain specified on Amazon Basics, that model may better suit your stability preferences. NEWBULIG’s appeal is its narrower listed footprint and adjustable flame, not a claim that it will feel warm across the full stated diameter in every condition.
Pros:
- Narrow 18.11-inch listed width among these three heaters.
- Adjustable flame gives more control over heat output.
- Includes wheels and a side cutout for checking tank position.
- Flame-out and 45-degree anti-tilt shutoffs are specified.
Cons:
- Ground anchors are described as unsuitable for hard concrete.
- No built-in tabletop like the Sweetcrispy.
- Propane tank is excluded.
Best for: Buyers with a tighter patio layout who want adjustable heat and a narrower listed base.
Not ideal for: People who need a built-in tabletop or plan to rely on the included ground anchors on concrete.
Bottom line: We recommend NEWBULIG for tighter layouts where adjustable flame and a narrower stated footprint matter more than a side table or water-weighted base.
“We recommend NEWBULIG for tighter layouts where adjustable flame and a narrower stated footprint matter more than a side table or water-weighted base.”
Amazon Basics 46,000 BTU Portable Outdoor Propane Patio Heater with Wheels
Amazon Basics is the practical alternative for buyers who value a base-weighting approach and a stated way to secure the tank. Its water box adds weight at the base, while a chain is included to secure the propane tank. That differs from the ground anchors supplied with Sweetcrispy and NEWBULIG, which are more dependent on the surface beneath the heater. On a paved patio where ground stakes are not useful, the water box may be the more relevant feature.The heater is rated at 46,000 BTU and claims coverage up to an 18-foot diameter, just below the 48,000 BTU ratings of the other two. The listing also calls out one-touch ignition, wheels, and an adjustable temperature knob. Its 91.3-inch height makes it the tallest of the three, while its 32.12-inch base is broadly similar to Sweetcrispy’s. It therefore suits open patios better than narrow spaces, especially compared with NEWBULIG’s slimmer listed dimensions.This model has a tilt safety shutoff, but the supplied description does not mention a flame-out shutoff, so buyers who want both protections should look closely at the other listings. Its feature set is comparatively straightforward: there is no built-in tabletop, and the supplied details do not specify an adjustable flame in the same terms as NEWBULIG. Pick it for the water box, tank chain, and familiar basic controls; choose Sweetcrispy for the added table and higher listed output.
Pros:
- Water box is designed to add weight at the base.
- Tank chain is included to secure the propane tank.
- One-touch ignition and adjustable temperature knob are specified.
- Wheels support repositioning around a larger patio.
Cons:
- 46,000 BTU is lower than the 48,000 BTU ratings of the other picks.
- At 91.3 inches, it is the tallest model in this comparison.
- Supplied description mentions tilt shutoff but not flame-out protection.
Best for: Buyers who prefer a water-weighted base and included tank chain for a paved, open patio.
Not ideal for: People seeking the highest listed output, a narrower base, or explicitly described flame-out protection.
Bottom line: We place Amazon Basics third because its weighted base and tank chain are useful differentiators, while its lower listed output and less complete stated shutoff details trail the two 48,000 BTU options.
“We place Amazon Basics third because its weighted base and tank chain are useful differentiators, while its lower listed output and less complete stated shutoff details trail the two 48,000 BTU options.”
As an Amazon Associate we earn from qualifying purchases.
Before You Start
Check the weather and the site. Do not use the heater in rain, high winds, or any enclosed or partly enclosed space such as a garage, tent, or covered porch unless the manufacturer explicitly rates it for that location. Propane heaters produce carbon monoxide and need open-air ventilation. Keep the heater away from doors, windows, siding, dry plants, and anything that can burn. Use the clearance distances printed on the heater or in its manual; those distances take priority over general advice.
Check the equipment. Do not proceed if the cylinder, hose, regulator, burner, or connections look damaged, corroded, or modified. Keep the cylinder upright, and do not smoke or use a flame while connecting or checking it. If you smell gas at any point, do not light the heater: close the cylinder valve if safe, move away, and follow the leak response in the manual.
Step-by-Step Instructions
Step 1: Choose an open, level location
Place the heater outside on a firm, level, noncombustible surface. Measure or check the required clearances around and above it using the manual. Keep it clear of foot traffic, exits, umbrellas, awnings, and overhead branches. Position it where it cannot be knocked over and where people can move around it without touching hot surfaces.
Tip: Never move a lit or hot heater. If the location is windy enough to affect the flame or stability, wait for calmer conditions.
Check: The heater stands upright without rocking, has the listed clearance on all sides, and is fully in open air.
Step 2: Assemble the heater as directed
Lay out the parts and identify each one from the manual before assembly. Attach the base, pole, reflector, and burner components in the specified order, tightening only as directed. Keep the control knob off during assembly. Do not force a threaded connection or substitute hardware; stop if parts do not align or a component is missing.
Tip: Some models require the base to be weighted or the cylinder compartment to be assembled a particular way. Follow the model-specific instructions rather than improvising.
Check: All listed parts are present, fasteners are secure, and the heater is upright and stable.
Step 3: Inspect and connect the propane cylinder
Confirm the heater control is off and the cylinder valve is closed. Inspect the cylinder for dents, rust, or other damage, and check the hose and regulator for cracks or wear. Set the cylinder upright in its designated compartment. Connect the regulator to the cylinder by hand or with the method specified in the manual; do not overtighten or use tools unless instructed. Keep the hose clear of hot surfaces and pinch points.
Tip: Use the correct cylinder connection for your model. A connection that seems to fit but does not seat correctly can leak.
Check: The cylinder is upright and secured, the connection is seated as directed, and the hose is not kinked or touching hot parts.
Step 4: Check the connection for leaks
With the heater control off, apply soapy water or an approved leak-detection solution to the cylinder connection and any other user-checkable joints named in the manual. Open the cylinder valve slowly. Watch the connections for bubbles. If bubbles grow, or you smell gas, close the cylinder valve, do not ignite the heater, and move away if the odor persists. Have the faulty part inspected or replaced according to the manufacturer’s guidance.
Tip: Never use a match, lighter, or other flame to look for a propane leak. Do not operate the heater until a leak is fixed.
Check: No growing bubbles appear at the tested joints, and there is no propane odor.
Step 5: Light the heater using its manual
Stand beside the heater with your face and clothing away from the burner. Open the cylinder valve as directed, then set the heater control to the lighting position. Press the igniter or use the manual’s specified lighting method. If the burner does not light within the stated time, turn the control off, close the cylinder valve, and wait the period specified before trying again. Do not keep releasing gas while attempting ignition.
Tip: Lighting sequences vary by model. Do not use an external flame unless the manufacturer expressly describes that method for your heater.
Check: The burner lights promptly and stays lit, with a steady flame pattern consistent with the manual.
Step 6: Set the heat and supervise use
Adjust the control to the desired heat setting. Stay nearby while the heater is operating, and keep children, pets, clothing, and furniture away from the hot emitter and reflector. Do not hang items from the heater or use it to dry clothing. If the flame goes out, turn the control off and follow the relighting instructions before trying again.
Tip: Keep a clear route to the cylinder valve so you can shut off the gas quickly. Do not leave the heater unattended.
Check: The heater runs steadily, remains upright, and the surrounding area stays clear of the required safety distances.
Step 7: Shut down and let the heater cool
Turn the heater control off, then close the cylinder valve. Follow the manual’s shutdown sequence if it specifies a different order. Keep people and objects away while the burner and metal parts cool completely. Do not disconnect the cylinder, cover, or move the heater while it is hot.
Tip: If you smell gas after shutdown, do not disconnect the cylinder near the odor. Close the valve if safe and follow the manual’s emergency instructions.
Check: The flame is out, the cylinder valve is closed, and the heater has cooled before handling.
Step 8: Store the heater and cylinder safely
Once cool, disconnect or store the cylinder only as the manufacturer directs. Keep propane cylinders upright outdoors in a well-ventilated location, away from heat, ignition sources, and living spaces. Store the heater dry and protected from weather as directed, with the cylinder removed if required. Check the hose and burner for damage before the next use.
Tip: Do not store a propane cylinder in a house, basement, or enclosed vehicle. Follow local rules for cylinder storage and transport.
Check: The heater is cool and protected, and the cylinder is upright in an approved outdoor storage location.
Common Mistakes to Avoid
- Using the heater under a roof, in a garage, or in another enclosed area. — Operate it only in an outdoor location allowed by the manual, with the listed clearances and open-air ventilation.
- Lighting the heater before checking the cylinder connection. — Inspect the parts and use soapy water or approved leak detector on the specified joints before every first use after connecting a cylinder.
- Trying to relight immediately after the burner fails. — Turn the control off, close the cylinder valve, and wait the time specified by the manual before another attempt.
- Moving or covering the heater while it is hot. — Shut it down, close the cylinder valve, and let all metal parts cool fully before moving, covering, or storing it.
Troubleshooting
Problem: The burner does not light.
Solution: Turn the control off and close the cylinder valve. Check that the cylinder contains propane, the valve is open only when you retry, and the igniter is being used as the manual describes. Wait the specified time before another attempt. If it still will not light, stop and contact the manufacturer or a qualified service provider.
Problem: The flame lights but goes out.
Solution: Turn the heater off and check for wind, a low cylinder, or a blocked air opening, following the manual. Let the heater cool before inspecting it. Do not dismantle gas components; request service if the flame continues to fail.
Problem: You smell propane or see bubbles at a connection.
Solution: Do not ignite the heater or operate electrical switches nearby. Close the cylinder valve if you can do so safely, move away, and keep others away. If the smell persists, contact emergency services or the propane supplier from a safe location. Do not use the heater until the leak is repaired and rechecked.
Problem: The heater feels unstable or tips easily.
Solution: Turn it off, close the cylinder valve, and let it cool. Move it to a firm, level surface and secure or weight the base only as the manual permits. Do not use it if it remains unstable or any part is bent or damaged.
What Success Looks Like
The task is complete when the heater is assembled as instructed, stable on a level outdoor surface, connected to an undamaged compatible cylinder, and has passed a leak check. It lights using the model’s approved method, runs steadily under supervision with safe clearances, then shuts off with the cylinder valve closed. After cooling, the heater and cylinder are stored as their instructions require.
Next Steps
Before each use, check the weather, clearances, stability, hose condition, and cylinder connection. Repeat the leak check whenever you connect a cylinder or disturb a gas fitting. At the end of the season, clean and store the heater as the manual directs, and arrange service for damaged or unreliable components. Replace worn parts with manufacturer-approved parts only.
Frequently Asked Questions
Can I use a propane patio heater on a covered patio?
Only if the heater’s manual permits that location and the installation meets its overhead and side clearances. Many covered spaces restrict ventilation or place combustible materials too close, so an open outdoor location is the safer choice when the manual is unclear.
How do I know if the cylinder connection is leaking?
Apply leak-detection solution to the specified joints with the heater off. Growing bubbles indicate escaping gas. A propane odor is also a warning. Close the cylinder valve if safe, do not light the heater, and have the leak addressed before use.
What should I do if the heater goes out while running?
Turn the control off and close the cylinder valve. Follow the manual’s wait time and relighting sequence. Check for wind or an empty cylinder only after the heater is safe to inspect. Stop using it if it repeatedly goes out.
Can I leave a propane patio heater on unattended?
No. Stay nearby whenever it is operating. Turn it off and close the cylinder valve when you leave the area or finish using it.
Can I store the propane cylinder indoors?
No. Store cylinders upright outdoors in a well-ventilated location away from heat and ignition sources, following the cylinder maker’s and local storage instructions.