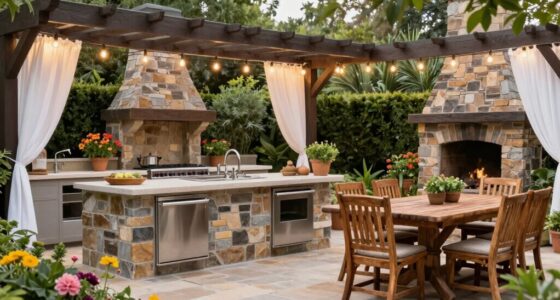
Install outdoor string lights by choosing a safe route, setting secure support points, and testing the lights before you finish. This guide is for homeowners and renters with a patio, deck, or yard who can use basic hand tools. Plan for about 1–2 hours; larger areas or new support posts may take longer.

Get garden gear delivered free with Prime
- Fast, free delivery on millions of items
- Prime Video, Amazon Music and more included
- Member-only deals all year

MGVIH 100-Foot Dimmable Outdoor LED String Lights with ST38 Bulbs
- ✔ Length: 100 feet
- ✔ Bulbs: 37 ST38 bulbs plus 2 spares
- ✔ Bulb spacing: Not specified

Brightever 100 ft Outdoor String Lights with 52 Shatterproof LED Bulbs
- ✔ Length: 100 feet
- ✔ Bulbs: 52 total, including 2 spares
- ✔ Sockets: 50

55 ft Connectable G40 LED Outdoor String Lights, 25 Bulbs, IP65 Waterproof
- ✔ Length: 55 feet
- ✔ Bulbs: 25 G40 LED
- ✔ Bulb spacing: 2 feet
Difficulty: Beginner | Time: 1–2 hours
What You’ll Need
Tools & Materials:
- Outdoor-rated string lights and any manufacturer-approved replacement bulbs
- Tape measure
- Pencil or removable marking tape
- Ladder rated for your weight and the working height
- Screw eye hooks, mounting clips, or other hardware suited to the support surfaces
- Drill and bits, if required for the chosen hardware
- Outdoor-rated extension cord, only if needed and permitted by the light manufacturer
Knowledge:
- Basic measuring and hand-tool use
- How to place a ladder on stable, level ground
Check local rules and your lease before drilling into a building or installing permanent posts. Read the light and hardware instructions before buying or mounting anything. Use only lights and cords marked for outdoor use, and connect them to a GFCI-protected outlet. Do not work near overhead power lines.
MGVIH 100-Foot Dimmable Outdoor LED String Lights with ST38 Bulbs
For buyers who want to adjust the lights after they are installed, MGVIH is the most convenient set in this lineup. Its remote offers four brightness levels, three lighting modes, and 3- or 5-hour timers, so we can change the atmosphere or set a schedule without adding a separate dimmer. Brightever also supports dimming, but its compatible dimmer is sold separately; the 55-foot G40 set has the same added-accessory requirement.The 100-foot length and 37 ST38 bulbs make this a practical choice for covering a larger area in one run. Its 2700K warm light is slightly less amber than the G40 set’s 2200K tone, while its IP65 rating and shatter-resistant PET bulbs suit outdoor hanging. Built-in hooks also help simplify attachment along a fence or overhead structure.There are limits to that convenience: the remote needs two AAA batteries, and the string still requires corded power. Its bulb count is lower than Brightever’s 50 sockets across the same stated length, so shoppers prioritizing more densely distributed light should compare the two carefully. The lighting modes may also be unnecessary if we only want steady illumination. We rank it first for flexible control, rather than maximum bulb density or expansion capacity.
Pros:
- Remote provides four brightness levels, three modes, and two timer settings.
- 100-foot length covers a substantial area in a single string.
- IP65 rating and shatter-resistant PET bulbs are intended for outdoor conditions.
- Built-in hooks support hanging along a patio, fence, or overhead structure.
Cons:
- Remote requires two AAA batteries.
- Corded electric power limits placement to areas reachable from an outlet.
- Its 37 bulbs are fewer than Brightever’s 50 sockets over a 100-foot length.
Best for: People covering a large outdoor area who want remote brightness adjustment and timer controls.
Not ideal for: Buyers who want the most bulbs per 100 feet, prefer a non-remote setup, or lack access to a suitable electrical outlet.
Bottom line: Choose MGVIH when remote controls and scheduling matter more than having the densest bulb layout.
“Choose MGVIH when remote controls and scheduling matter more than having the densest bulb layout.”
Brightever 100 ft Outdoor String Lights with 52 Shatterproof LED Bulbs
Brightever stands out when a wide patio or yard needs a long, relatively full-looking run. The set has 100 feet of string with 50 sockets and includes two spare bulbs, giving it more bulb positions than MGVIH’s 37 bulbs over the same stated length. That distinction can matter when we want more points of light along an overhead run. It can also connect up to 15 strands, compared with the G40 string’s maximum of 14.Its warm 2700K ST38 LEDs, shatter-resistant plastic bulbs, and hooks suit outdoor installations. Compared with MGVIH, though, Brightever does not include remote brightness control or timer settings. Dimming requires a compatible accessory sold separately, so changing brightness is less straightforward. The G40 set has this same separate-dimmer drawback, but its shorter 55-foot length and 25 bulbs make it a better fit for a compact layout rather than broad coverage.Brightever is therefore our coverage pick, not the easiest set to operate. It needs an AC outlet, and connecting multiple strands means planning their route and attachment points. The supplied details describe it as waterproof, but do not provide an IP rating; shoppers who want a specific protection rating should compare that with MGVIH’s stated IP65 specification. Choose it for reach and expansion when built-in controls are not central to the decision.
Pros:
- 100-foot length with 50 sockets provides more bulb positions than the MGVIH set.
- Supports connection of up to 15 strands.
- Includes two spare bulbs and built-in hanging hooks.
- Warm 2700K LEDs use shatter-resistant plastic bulbs.
Cons:
- Compatible dimmer is sold separately.
- Requires an AC outlet and a corded installation route.
- The supplied specifications do not state an IP rating.
Best for: People who want a 100-foot run with many bulb sockets and room to expand across a larger outdoor space.
Not ideal for: Buyers who want remote dimming or timer controls included, or who need a stated IP rating for comparing outdoor protection.
Bottom line: Pick Brightever when long, expandable coverage and a higher socket count matter more than included controls.
“Pick Brightever when long, expandable coverage and a higher socket count matter more than included controls.”
55 ft Connectable G40 LED Outdoor String Lights, 25 Bulbs, IP65 Waterproof
Where the two 100-foot sets could create unnecessary slack, this 55-foot G40 string offers a more manageable span for a balcony, small patio, or short pergola edge. Its 25 bulbs sit two feet apart, so the layout reads as spaced accents along the run rather than a dense line of sockets. The lower bulb count is a clear tradeoff against Brightever’s 50 sockets and MGVIH’s 37 bulbs, both across longer 100-foot strings.The light is rated at 2200K warm white, giving this option the most amber-toned color temperature of the three. It also carries an IP65 rating, uses shatterproof plastic/PET bulbs, and has hooks on each socket. If the area grows, we can connect up to 14 strings, one fewer than Brightever supports. Independent bulb operation means one extinguished bulb will not switch off the rest of the string.Its control setup is simpler than MGVIH’s: there is no included remote, and dimming requires a compatible dimmer that is not included. It also needs a corded electrical connection, like the other picks. This is the compact-layout choice for shoppers who value a shorter run and more amber light, but buyers covering a large area should start with one of the 100-foot options instead.
Pros:
- 55-foot length is easier to fit to smaller outdoor areas.
- IP65 rating and shatterproof plastic/PET bulbs suit outdoor use.
- Hooks on each socket support hanging, and the string can connect up to 14 sets.
- 2200K light offers a more amber tone than the two 2700K options.
Cons:
- Only 25 bulbs across 55 feet, fewer than either 100-foot set.
- Compatible dimmer is not included.
- Requires corded electrical power.
Best for: People decorating a smaller patio or balcony who want a shorter string, wider bulb spacing, and 2200K warm light.
Not ideal for: Buyers lighting a large area with one run, seeking built-in remote controls, or wanting a dimmer included.
Bottom line: Choose the G40 set for a shorter, warmly tinted patio run where its wider bulb spacing fits the layout.
“Choose the G40 set for a shorter, warmly tinted patio run where its wider bulb spacing fits the layout.”
As an Amazon Associate we earn from qualifying purchases.
Before You Start
Choose a dry day and keep the lights unplugged while planning and mounting them. Never staple, nail, or screw through the light cord. If the route would cross a walkway, hang where people could hit their heads, or require work close to power lines, choose another layout or ask a qualified electrician for help.
Check the product label for the maximum number of connected strands and the permitted bulb type. A plug that fits does not mean a strand can safely support another strand. Plan to place the outlet connection where it stays protected from standing water and where the cord will not be pinched by doors or foot traffic.
Step-by-Step Instructions
Step 1: Measure the area and choose a route
Measure the span between the places where you want the lights to start and end. Sketch the route, mark each support point, and note the outlet location. Leave room for the cord to hang in a gentle curve, and keep it clear of doors, grills, sharp edges, and walking routes. If you want a canopy or zigzag pattern, measure each section separately and include the extra length that pattern needs.
Tip: Do not plan the route by stretching the strand tightly between supports. A little slack creates a more relaxed hang and reduces strain on the cord and connectors.
Check: You have a simple route plan with the total span, support locations, and a reachable outlet connection.
Step 2: Confirm the lights and supports are suitable
Read the light package and product instructions for outdoor-use, weather, bulb, connection, and mounting details. Check that the walls, posts, beams, or trees along your route can hold the selected hardware. Choose fasteners made for the support material; for example, wood screws belong in sound wood, while masonry requires anchors designed for masonry. Do not rely on adhesive hooks unless their instructions specifically allow outdoor use and the load.
Tip: If the span is long, the strand feels heavy, or the manufacturer calls for a guide wire, install that support system before hanging the lights. Do not make the electrical cord carry more weight than its instructions allow.
Check: The lights are labeled for outdoor use, the mounting hardware matches each support surface, and the required support method is clear.
Step 3: Mark mounting points and install hardware
Transfer your planned support locations to the posts or walls with pencil or removable tape. Check that the marks create a clear path and that the intended sag will not put the strand within reach of people or objects. Set the ladder on firm, level ground and keep your body centered between its rails. Drill pilot holes if the hardware instructions call for them, then install the hooks or clips firmly without splitting the wood or damaging hidden wiring.
Tip: Before drilling into a building, check for hidden electrical cables and pipes. If you cannot confirm the area is clear, do not drill there.
Check: Each support is firmly attached, aligned with the route, and free of sharp edges that could cut or scrape the cord.
Step 4: Lay out and inspect the strand
Keep the strand unplugged. Uncoil it on a clean, dry surface and check the entire length for cracked sockets, frayed insulation, loose connections, damaged plugs, or missing seals. Replace damaged lights with an intact strand rather than attempting a cord repair. Fit only the bulb type specified by the manufacturer, and do not exceed any stated wattage or strand-connection limit.
Tip: Handle the strand by its cord supports and sockets as directed by the manufacturer. Pulling on a plug or bulb can loosen a connection.
Check: The strand and bulbs show no visible damage, and the bulbs and any connected strands match the product instructions.
Step 5: Hang the lights without straining the cord
Starting at the end farthest from the outlet, place each socket or built-in hanging loop onto its support as the manufacturer directs. Work across the route, letting the strand form a gentle, even curve between supports. Keep the plug and connection ends accessible, and secure the cord so wind cannot make it rub against rough surfaces. Do not use the cord itself as a tie or force a plug connection around a hook.
Tip: Ask another person to steady the ladder or manage the loose strand when the route is high or long. Move the ladder as needed instead of leaning beyond its sides.
Check: The lights hang evenly, each support carries the intended load, and no section is stretched, pinched, or rubbing on a sharp edge.
Step 6: Route the plug and protect the connection
Run the plug end to a GFCI-protected outdoor outlet, or use an outdoor-rated extension cord only when the light instructions permit one. Keep the connection off the ground and away from puddles, sprinklers, and places where water can collect. Use a weatherproof cover that is rated for the outlet and connection setup. Secure cords along an edge where they will not be stepped on, caught in a door, or exposed to a mower.
Tip: Do not daisy-chain extension cords or use indoor cords outdoors. If the available outlet or cover does not suit the connection, have a qualified electrician assess the setup.
Check: The connection is protected from direct exposure and standing water, and the cord does not cross a walkway or become pinched.
Step 7: Test the lights and check the installation
With dry hands, plug in the strand and switch it on. Check that every section lights, the bulbs remain seated, and the outlet does not trip. From the ground, look for uneven sag, loose hooks, cord contact with sharp surfaces, or any point that could be struck by a person or object. Unplug the lights before correcting a mount, replacing a bulb, or adjusting the cord.
Tip: If a GFCI trips, unplug the strand and inspect it for damage or moisture before trying again. Do not repeatedly reset a tripped outlet.
Check: The strand lights consistently, all supports remain secure, and the route stays clear of people, hazards, and standing water.
Common Mistakes to Avoid
- Using indoor lights or an indoor extension cord outside. — Check the labels and use outdoor-rated lights and cords that match the product instructions.
- Hanging the strand tightly or letting it carry too much weight. — Allow a gentle curve and add manufacturer-approved support for long spans or heavy strands.
- Fastening through the cord with a staple, nail, or screw. — Attach hooks or clips to the support surface first, then place the cord in the intended holder.
- Connecting more strands than the product allows. — Read the maximum connection and load limits on the package and follow them for the exact model.
Troubleshooting
Problem: The lights do not turn on.
Solution: Unplug the strand, check that bulbs and plugs are seated, and inspect for visible damage. Confirm the outlet works with a suitable device and check the GFCI. Replace a damaged strand; do not splice or tape a damaged cord.
Problem: The GFCI trips when the lights are plugged in.
Solution: Unplug the lights and leave the outlet off while you inspect the strand and connection for damage or moisture. Let wet components dry only as the manufacturer permits. If the outlet trips again with an intact, dry setup, stop using it and contact an electrician.
Problem: The strand sags too low or pulls on a support.
Solution: Unplug it, reduce the span between supports, or install an approved guide wire or additional supports. Use hardware suited to the surface and keep the cord itself free from excessive tension.
Problem: A bulb is dark while the rest are lit.
Solution: Switch off and unplug the lights, then check the bulb seating and replace it only with the specified type. If the socket is damaged or the problem remains, stop using the strand and follow the manufacturer’s service guidance.
What Success Looks Like
The completed installation has an even, gentle hang, secure supports, an intact outdoor-rated strand, and a protected connection to a GFCI outlet. The lights switch on across the full route without tripping the outlet, and cords stay clear of doors, walkways, sharp edges, and standing water.
Next Steps
Unplug the lights before cleaning, changing bulbs, or adjusting hardware. After storms and periodically during the season, check that hooks remain secure and that cords, sockets, and covers show no wear or water damage. Switch off or unplug the set when you leave for an extended period, following the product instructions. Remove or store the lights when the manufacturer calls for seasonal storage, and replace any strand that becomes damaged.
Frequently Asked Questions
Can I leave outdoor string lights up all year?
Only if the manufacturer says the exact model can remain outdoors year-round in your conditions. Weather exposure varies, so inspect the strand and mounts regularly and store or remove it when the instructions call for seasonal protection.
How far apart should the support points be?
Use the support spacing and hanging method specified by the light manufacturer. Shorter spans usually reduce sag and strain. Add support points or a guide wire when the product instructions recommend them.
Can I plug multiple light strands together?
Only when the product instructions allow it, and only up to the stated number or electrical limit for that model. Do not assume matching plugs mean the strands can be safely combined.
Do I need a guide wire?
Use one when the manufacturer requires it or when the span and strand weight would otherwise pull on the electrical cord. Attach the guide wire to suitable supports, then hang the lights from it using compatible clips.
What should I do if the lights get wet?
Follow the product instructions for rain and wet conditions. If a plug or connection is wet, switch off power at the outlet or breaker when safe, then unplug only when it is safe to do so. Do not use the set again until it is dry and inspected as directed.