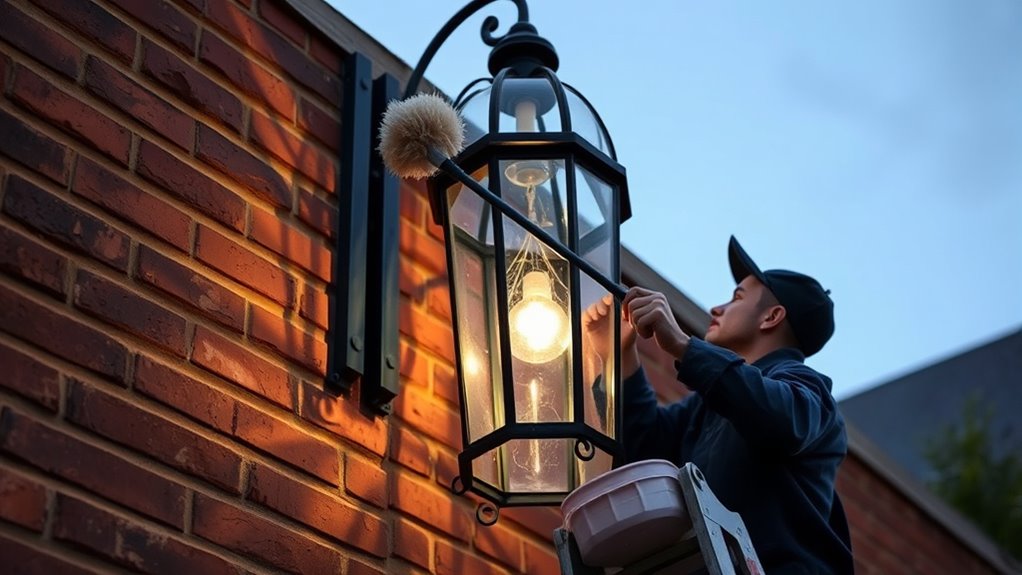

To maintain your outdoor lighting fixtures, start by turning off power or disconnecting solar panels before cleaning. Use a soft cloth with mild soap and water to gently remove dirt, dust, and insect residue from the lens and housing. Regularly inspect bulbs or LEDs for dimming or burnout, replacing them with the manufacturer’s recommended types. Check mounting hardware for rust or looseness and make sure weatherproof seals are intact. Keep your fixtures in top shape—there’s more helpful tips ahead.
Key Takeaways
- Turn off power and disconnect solar panels before cleaning or replacing bulbs to ensure safety.
- Use a soft cloth and mild soap to clean lenses, housings, and solar panels without scratching surfaces.
- Regularly inspect bulbs or LEDs for dimming or burnout, replacing with manufacturer-specified types.
- Ensure fixtures are securely mounted with weatherproof seals to prevent moisture damage during bulb replacement.
- Position solar fixtures in areas with ample sunlight and check hardware periodically to maintain optimal performance.
Outdoor lighting fixtures enhance your property’s safety and curb appeal, but they require regular maintenance to stay functional and attractive. Whether you’ve installed traditional wired lights or opted for solar energy-powered fixtures, keeping them clean and well-maintained guarantees they perform at their best and last longer. Solar energy fixtures, in particular, offer an eco-friendly and cost-effective option, but they rely heavily on proper fixture installation and regular upkeep to maximize their efficiency.
Proper maintenance and installation extend the lifespan and efficiency of your outdoor solar lighting fixtures.
When it comes to cleaning your outdoor lighting fixtures, the first step is to turn off the power or disconnect the solar panels if applicable. Dirt, dust, and insect residue can accumulate on the lens and housing, diminishing brightness and effectiveness. Use a soft cloth or sponge with mild soap and water to gently wipe down the fixture, paying special attention to the lens or cover. For solar-powered fixtures, guarantee the solar panel surface is free from debris or dirt, as this can block sunlight absorption. If dirt or grime has built up on the solar panel, gently clean it with a damp cloth, taking care not to scratch the surface, since this can impair energy collection.
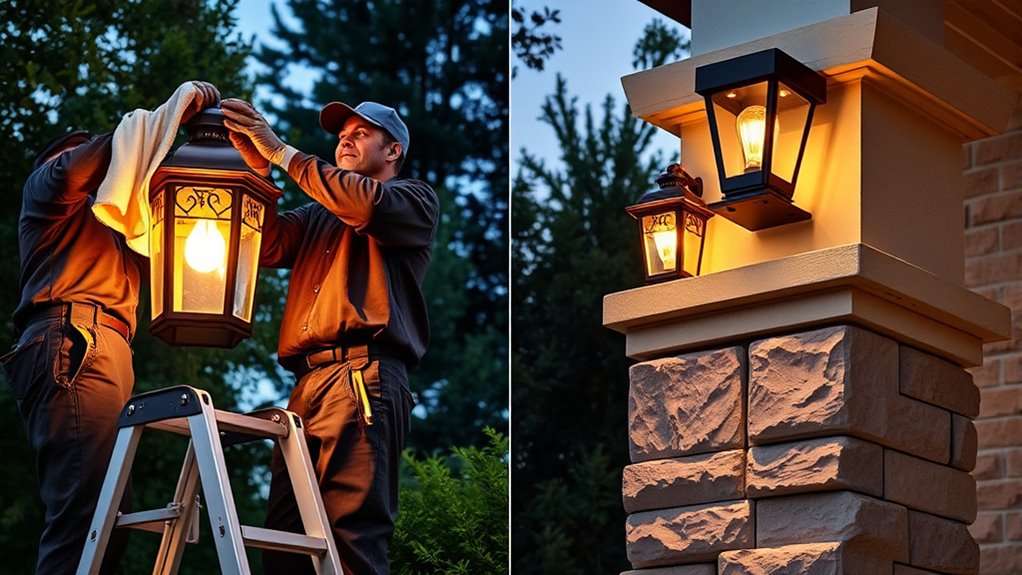
Regularly inspecting your fixtures also involves checking the bulbs or LEDs. Over time, bulbs burn out or LEDs dim, reducing the illumination you need for safety or aesthetic purposes. When replacing bulbs, make sure you are using the correct type and wattage specified by the manufacturer. If your outdoor fixtures are designed for easy bulb replacement, simply remove the old bulb, and install the new one securely. For solar fixtures, if the LED lights appear dim despite a clean solar panel, consider replacing the entire fixture or upgrading to more efficient LED options.
Fixture installation plays an essential role in the longevity of your outdoor lighting. Properly installed fixtures are less prone to damage and easier to maintain. Ensure that fixtures are mounted securely, with weatherproof seals intact to prevent moisture from seeping inside. For solar fixtures, positioning is key; they should be placed in areas that receive ample sunlight during the day. Periodically check the mounting hardware for rust or looseness, and tighten or replace parts as needed. Proper fixture installation not only keeps your lights working efficiently but also helps prevent the need for frequent repairs or replacements. Additionally, understanding power sources and how they influence fixture performance can help in planning effective maintenance routines.
Frequently Asked Questions
How Often Should Outdoor Lighting Fixtures Be Inspected?
You should inspect your outdoor lighting fixtures at least twice a year, following a consistent timing schedule. Use an inspection checklist to confirm you check for dirt buildup, damaged bulbs, and corrosion. Regular inspections help catch issues early, keeping your outdoor space safe and well-lit. Schedule these checks before winter and summer to maintain ideal lighting, and don’t forget to replace bulbs and clean fixtures during each inspection.
Can I Upgrade to Energy-Efficient Bulbs Easily?
Yes, you can easily upgrade to energy-efficient bulbs. Just turn off the power, remove the old bulbs, and install LED upgrades. Many LED options are compatible with existing fixtures, making the switch simple. You might also consider smart lighting options, allowing you to control and customize your outdoor lighting remotely. These upgrades save energy and extend bulb life, enhancing your outdoor space efficiently and conveniently.
What Safety Precautions Are Needed During Bulb Replacement?
Think of bulb replacement as dancing on a tightrope—you need focus and care. Always guarantee ladder safety by securing it properly, and turn off the power to avoid electrical shocks. Use insulated gloves if possible, and never rush. Keep your work area clear of obstacles, and double-check that the fixture is off before handling bulbs. These precautions keep you safe while brightening your outdoor space with confidence.
Are There Weather-Resistant Options for Outdoor Fixtures?
Yes, you can find weather-resistant outdoor fixtures made with corrosion-resistant materials like stainless steel or aluminum. Look for fixtures with weatherproof coatings that protect against rain, snow, and humidity. These features guarantee durability and longevity. When choosing, verify the fixture’s IP rating, which indicates its resistance to water and dust. Opting for these options helps keep your outdoor lighting safe and functional in all weather conditions.
How Do I Troubleshoot Flickering Outdoor Lights?
You can troubleshoot flickering outdoor lights by checking for wiring issues first; verify all connections are tight and no wires are damaged. If wiring looks good, consider timing adjustments if you have timers or motion sensors, as they might need reprogramming. Sometimes, flickering is caused by incompatible bulbs or electrical surges. Turning off the power, inspecting, and making these adjustments should help stabilize your outdoor lighting.
Conclusion
By regularly cleaning and replacing bulbs, you keep your outdoor lighting fixtures in top shape. This simple upkeep not only guarantees your space stays well-lit and inviting but also prevents small issues from snowballing into costly repairs. Remember, a stitch in time saves nine, so don’t wait until darkness falls completely. With a little effort now, you’ll enjoy a brighter, safer outdoor area all year round—because a well-lit home is a happy home.